
I share with you the sixth art-ivity that my students and I did in the Creative Remix sessions I facilitated at the Roundhouse Centre… Mini Monoprints!
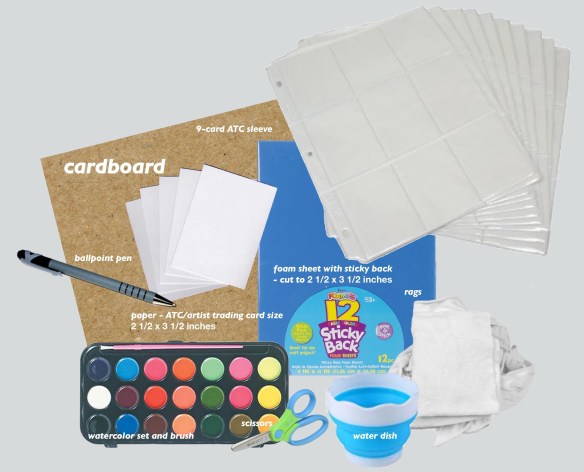
The materials we used:
- foam sheet, preferably with stickie back
- card stock/drawing/watercolour paper (whatever you have)
(ATC/artist trading card size – 2 1/2 x 3 1/2 inches - ballpoint pen
- scissors
- brushes
- watercolour
- water dish
- rag/towel
- 9-card Artist Trading Card Plastic Sleeve
Learn about the history of ARTIST TRADING CARDS
STEPS
1. The Printing Plate —Cut the foam sheet to ATC size 2 1/2 x 3 1/2 inches, mount on cardboard or anything sturdy.

2. Using a ballpoint pen, draw on the foam printing plate. Try to create just one big image rather than a multitude of little figures/details.

A simple rainbow-design on a mini foam printing plate
3. Using a brush, apply watercolor onto the foam plate, then quickly press the paper onto the plate. It is best to rub palm onto paper to ensure that it picks up as much detail from the plate.
4. Pull your paper/print, and try another color combination, and make more prints.

Nine mini monoprints from one foam printing plate
I asked my students to make a minimum of 9 prints each. It was fun to see the different color combinations they came up with. Check out their creations below:

This is a great example of a simple and very focused design that creates a most striking effect. The bird’s colors do not change just the background.
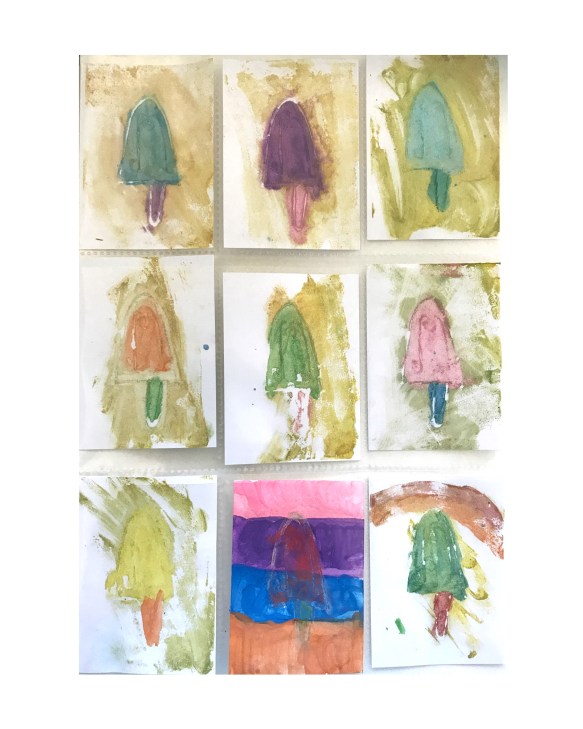
POPSICLE – what a perfect summer print (and treat)!!!
Here are six more print series by my students. Bear in mind that these are kids ages 5 to 10 making monoprints for the first time.


The children were quite proud of their mini monoprints. At first they thought I was asking too much when I said they have to produce a minimum of 9 prints, but they did it! CONGRATS kids!

Some beautiful artworks!!!